WordPress has been empowering bloggers and their websites for the last 17 years. In these 17 years, WordPress has evolved a lot and at present, it has everything that is required to create a website. Here website doesn’t refer to a basic single page or portfolio portals, it refers to the complex websites that generally use to require hours of coding and loads of capital for maintenance.
WordPress has almost eliminated the traditional style of building websites. Now you don’t need to have programming skills to develop a website, you just need to have an internet connection and a few bucks to buy a basic hosting plan. Most bloggers pick a wrong hosting plan and end paying extra money. If you want to save a few bucks, then you can check websites that review hosting plans regularly.
Today, you will learn how to create a custom WordPress theme without writing a single line of code. The whole process is explained in this tutorial and you’ll just need a plugin and a basic theme to create your custom theme.
Follow the steps mentioned below to minimize the hustle of the process:
Steps to create a custom WordPress theme easily
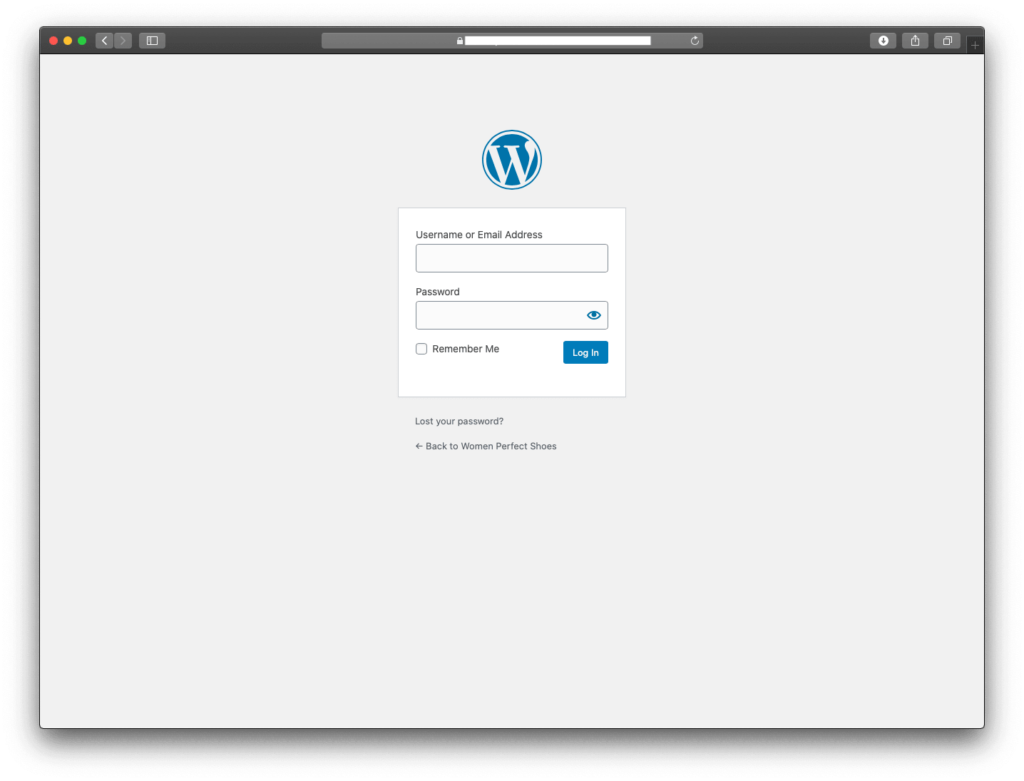
Step 1. Login to your website’s WordPress admin dashboard.
Note: Make sure you are using VPN for security while logging in to your WP-Admin dashboard.
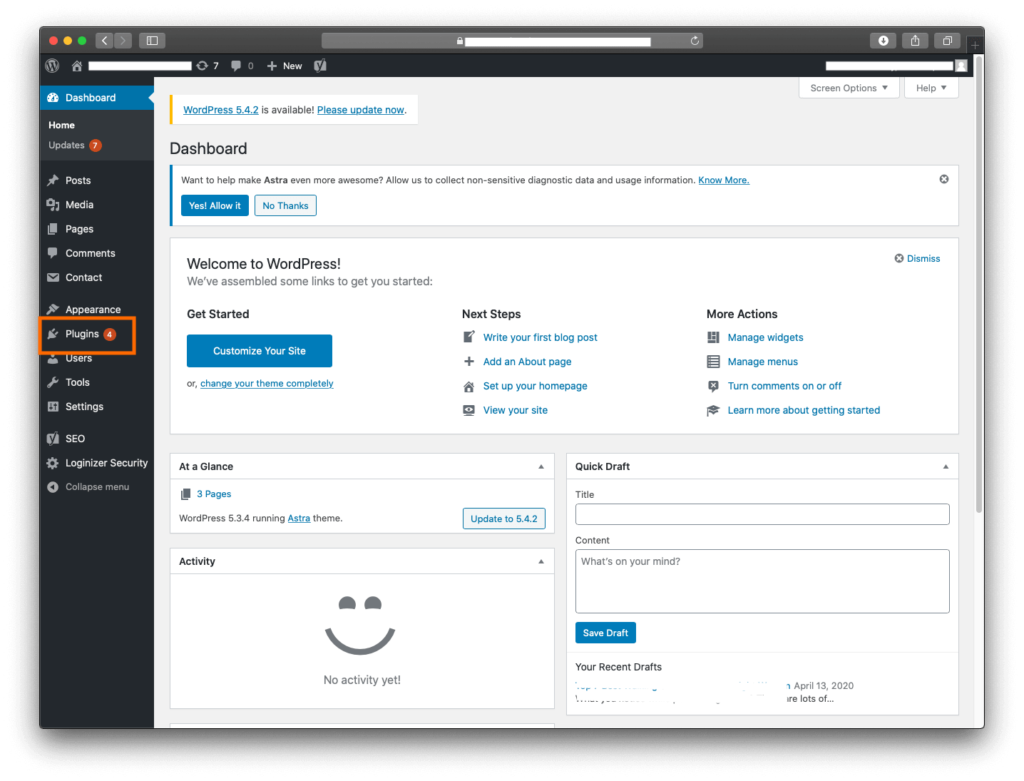
Step 2. Navigate to Plugins option in the left sidebar of WP-Admin.
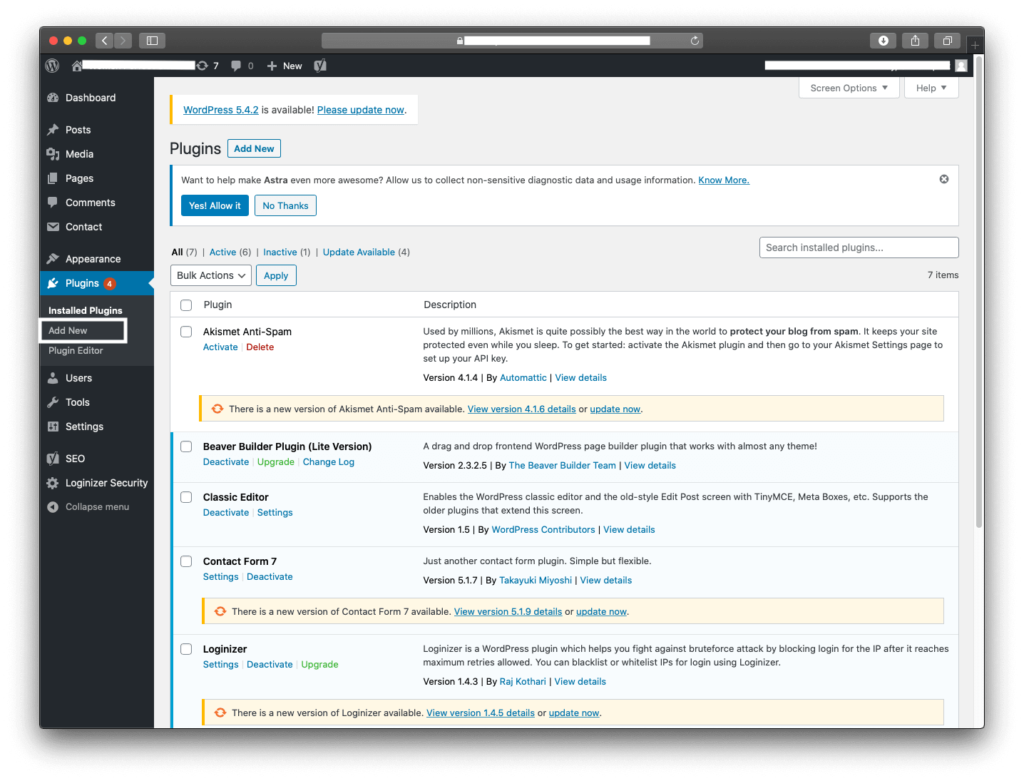
Step 3. Click on Add New Plugin
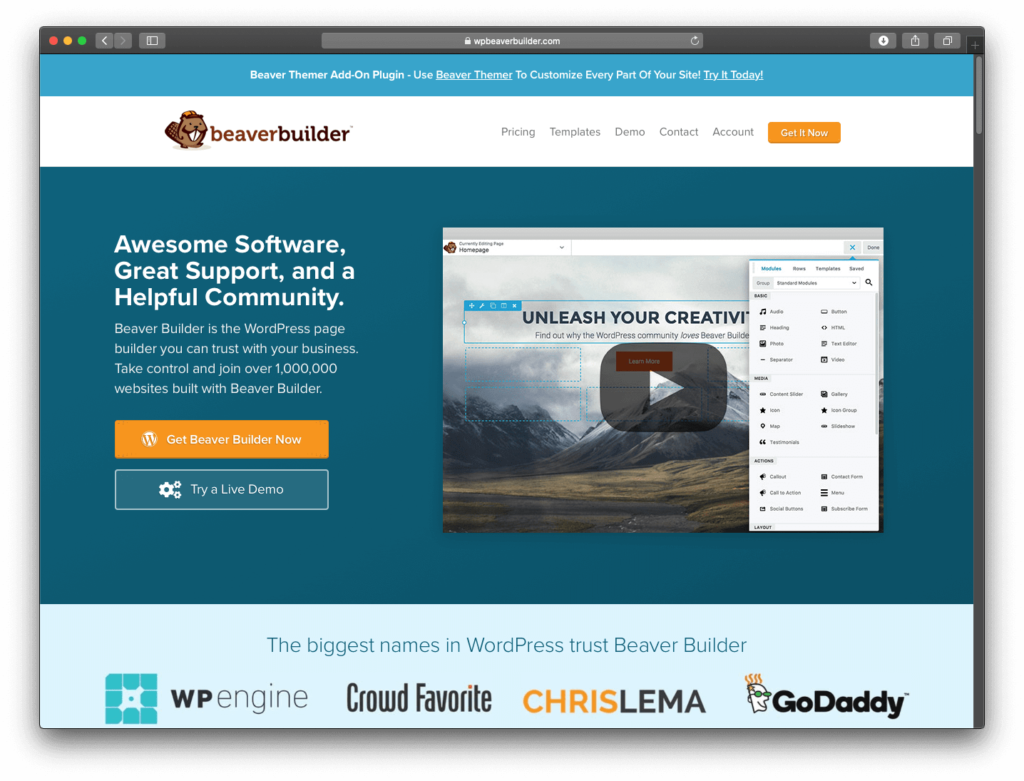
Step 4. Search for Beaver Builder or you can download the Beaver Plugin from their official website.
Note: Beaver builder is a paid plugin, you can their pricing and pick the most appropriate plan as per your requirements. This plugin works best with basic WordPress themes. It is recommended to free themes that are available by default in WordPress. You can also use the free version of Astra, the GeneratePress theme.
Skip using premium themes because your investment won’t be worth it as you are about to create a custom theme that can will free of cost for you. You can even share it without friends or anyone you want. If you are good a designer then you can also sell it to your clients or co-bloggers.
Step 5. Install the Beaver Builder.
Now, in the next segment, you will learn How to set your desired header to your custom theme.
How to Add Header and Footer in Custom Theme
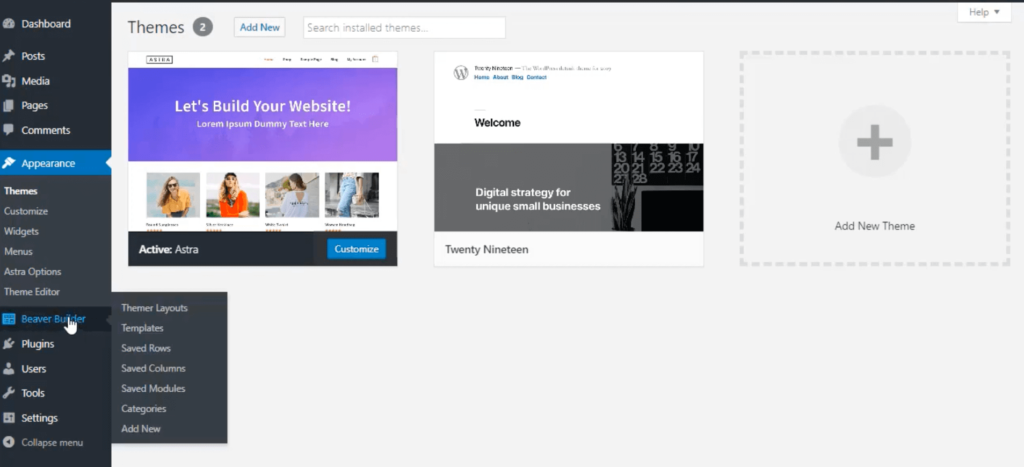
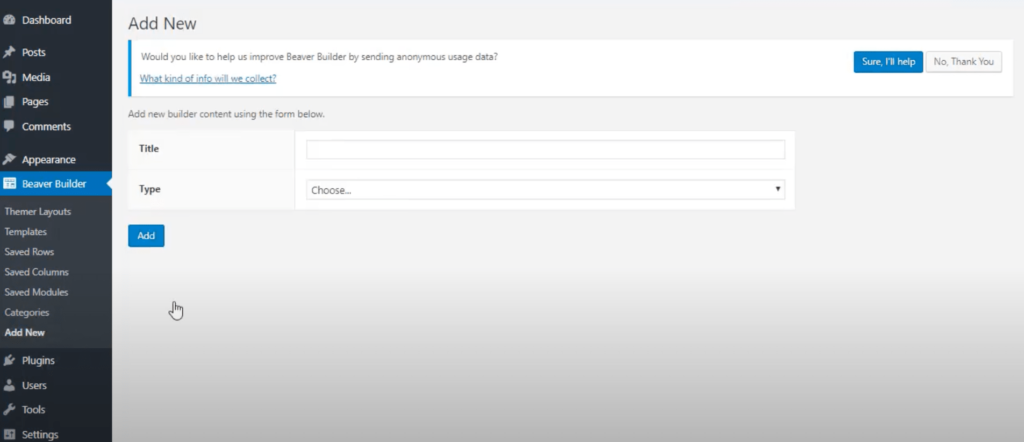
Step 1. Navigate to the Beaver Builder in the left sidebar of WP-Admin.
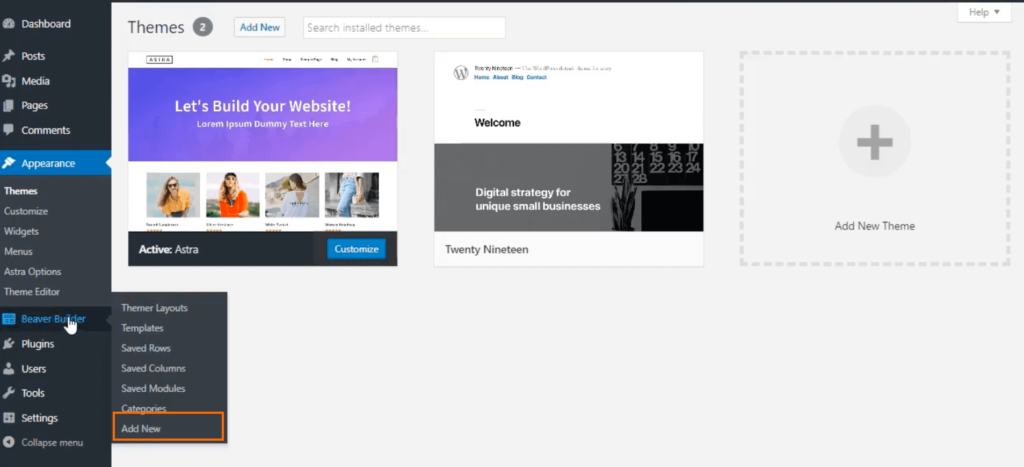
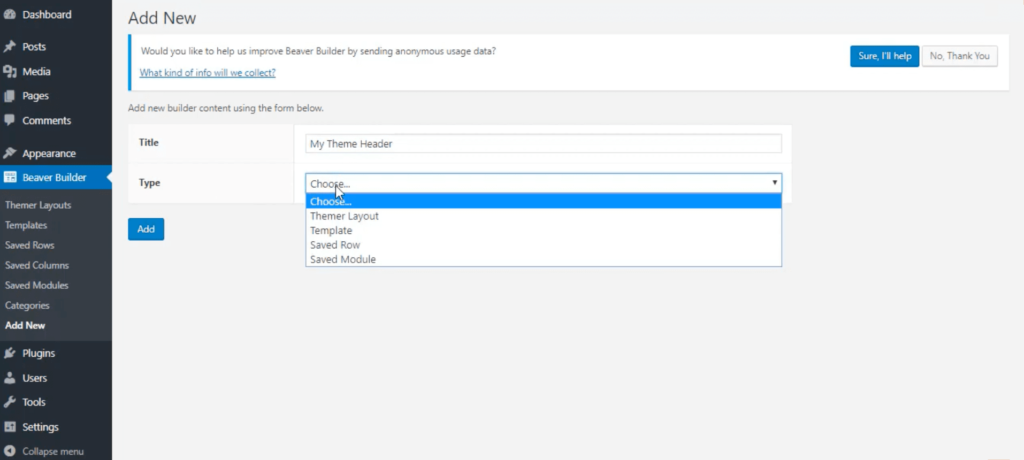
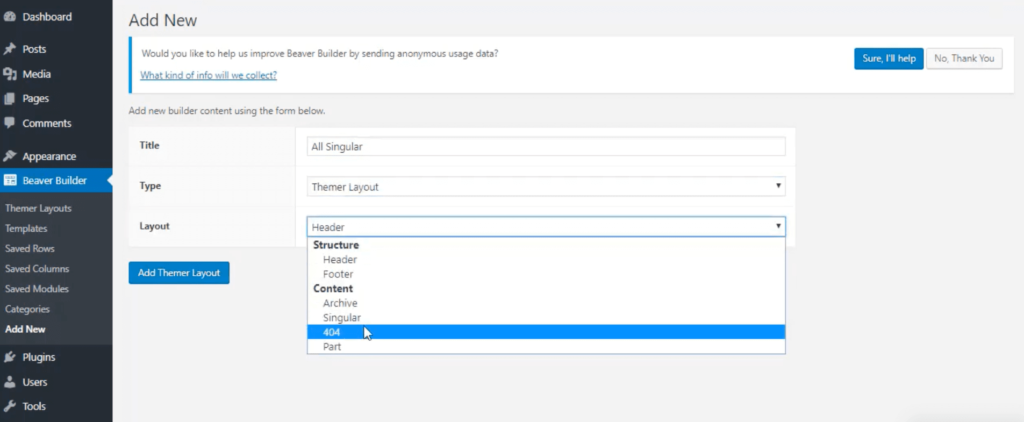
Step 2. Click on Add New option under Beaver Builder.
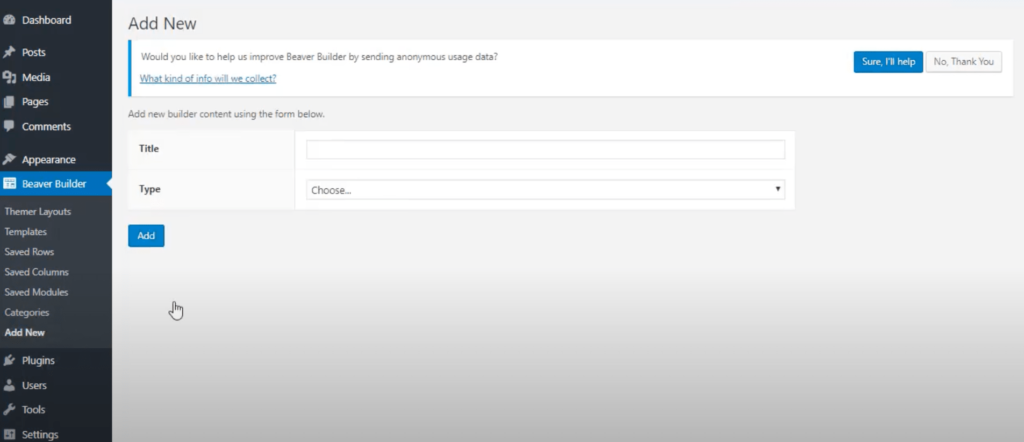
Step 3. A new webpage will open, here you will have two fields (Title and Type).
Step 4. Enter an appropriate title and select the “Themer layout” option in the Type field.
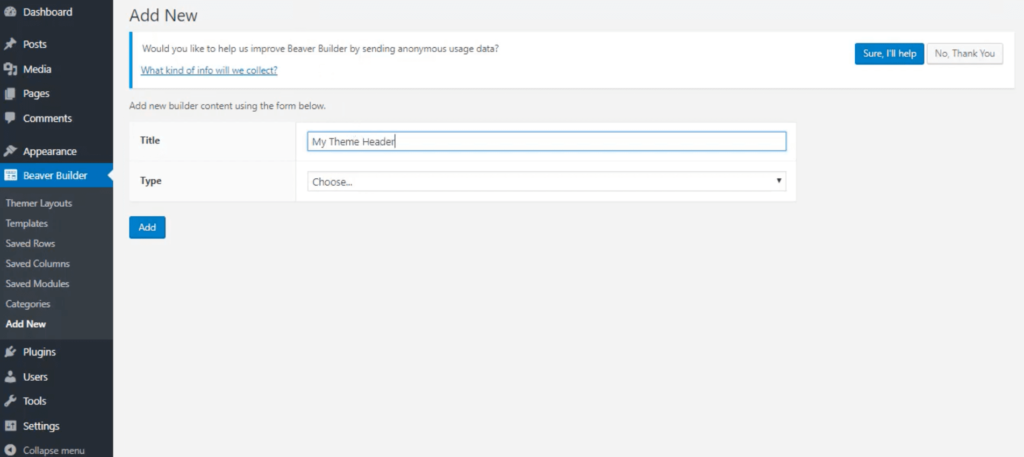
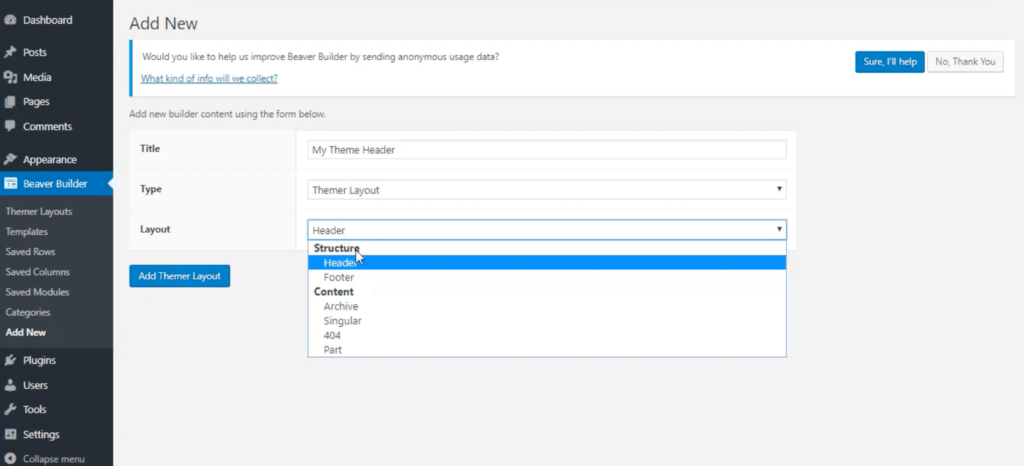
Step 5. As soon as you will select the “Themer layout”, a new field will appear “Layout”.
Step 6. In the new field, select the “Header” or “Footer” option.
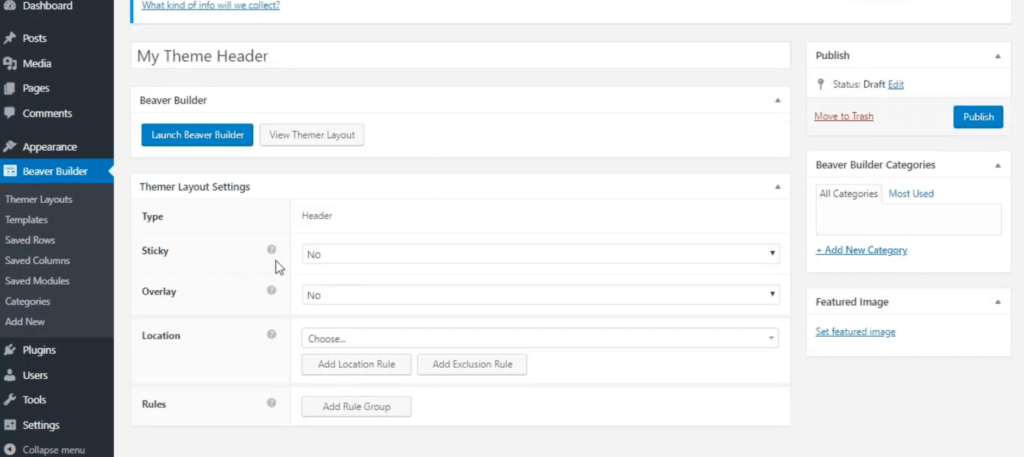
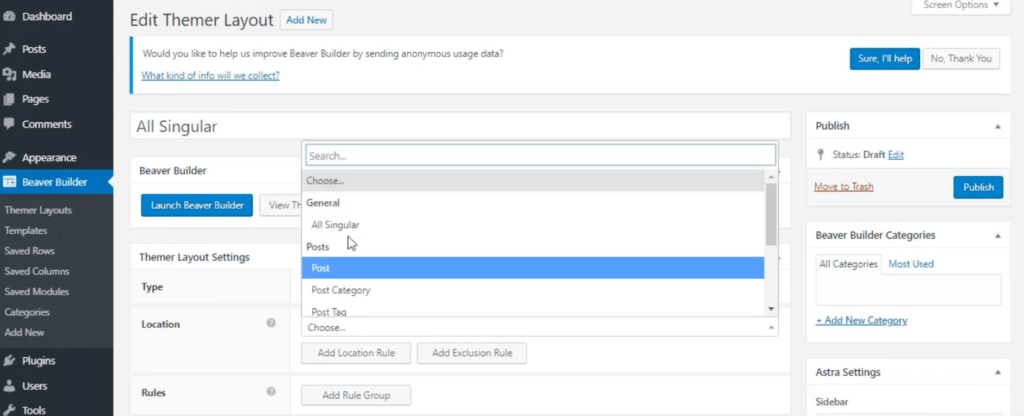
Step 7. A new webpage will appear, where you will have the following fields. Refer to the image attached below.
Note: If you want to make your header or footer sticky, you can enable it in the Sticky option. Besides this, you can set the location. Navigate among the options and select as per your requirements.
You can also apply specific filters in the rules section.
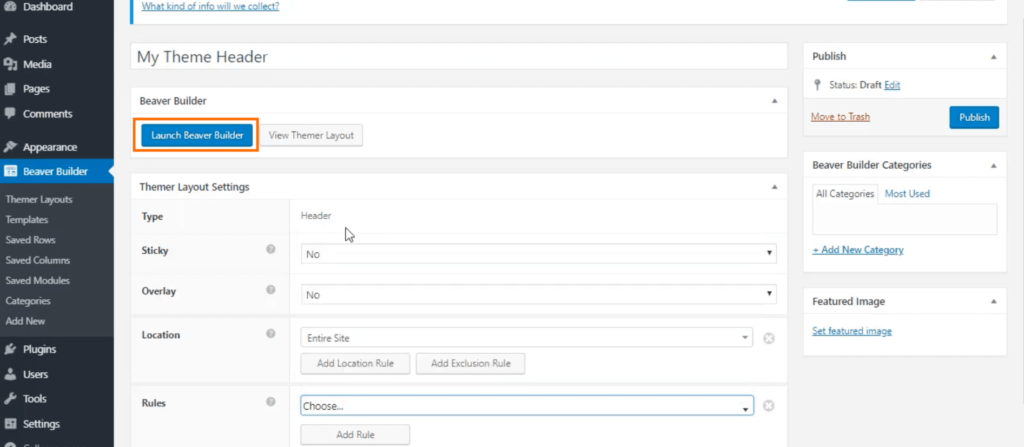
Step 8. Now Click on the “Launch the beaver builder” Tab.
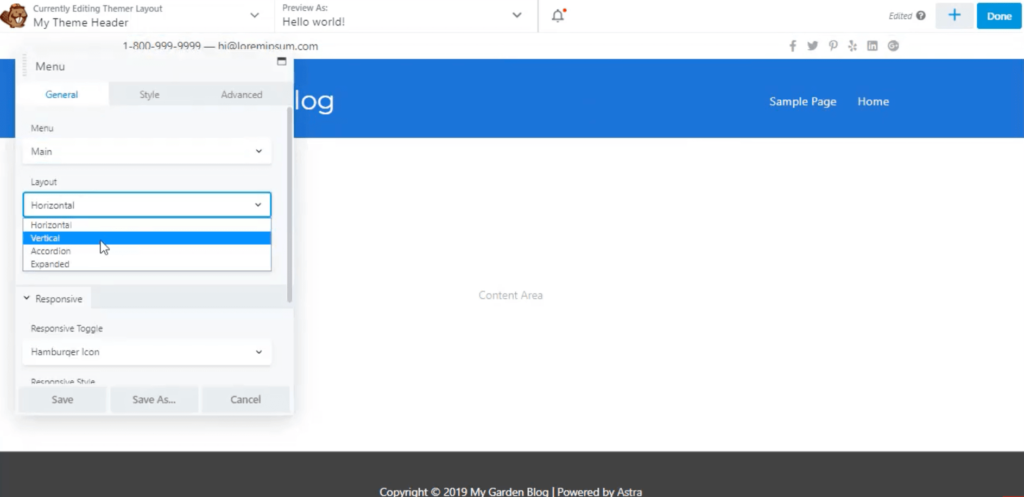
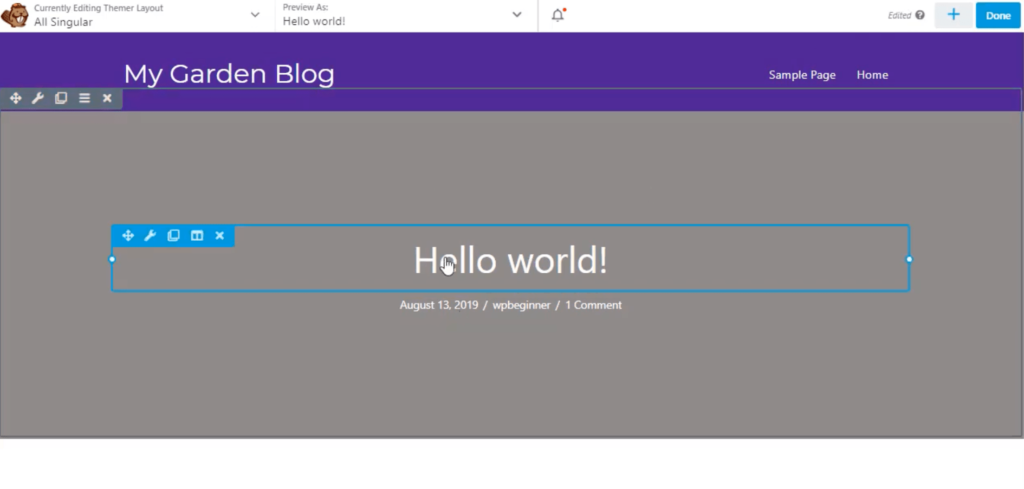
Step 9. A customization window will appear and there you can change the look and feel of the header. It is recommended to check all the customization options available. You can add animations, styles, custom backgrounds.
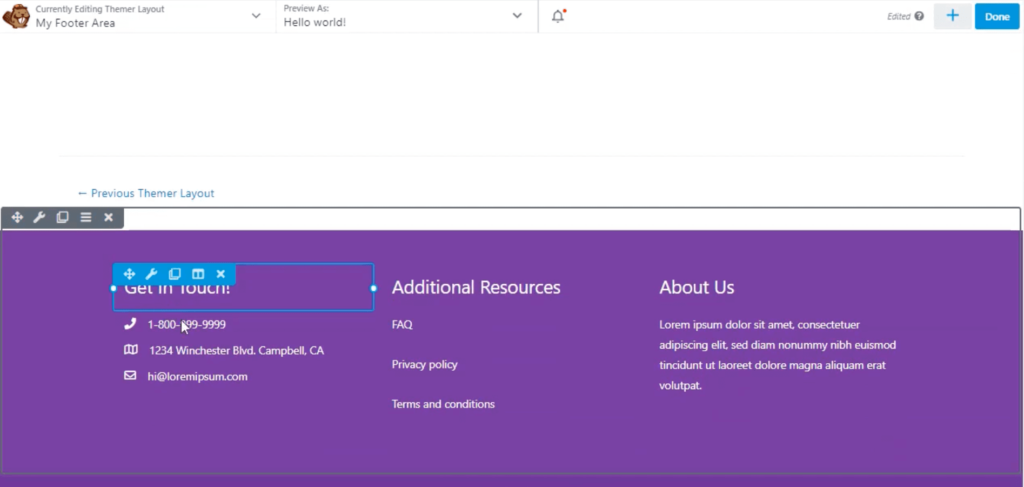
Note: In the case of the footer, you can add custom fields in it, and in order to do, you have to use the “+” button and a list of options will appear. Choose as per the requirements.
Step 10. Once you are done with the customization, Hit the “Publish” button.
So far, you have created a custom header and a custom footer in your custom theme. Now, you’ll learn,
How to create a single post area in your theme
Step 1. Go to WP-Admin dashboard.
Step 2. Navigate to Beaver Builder Plugin and Click on Add New option.
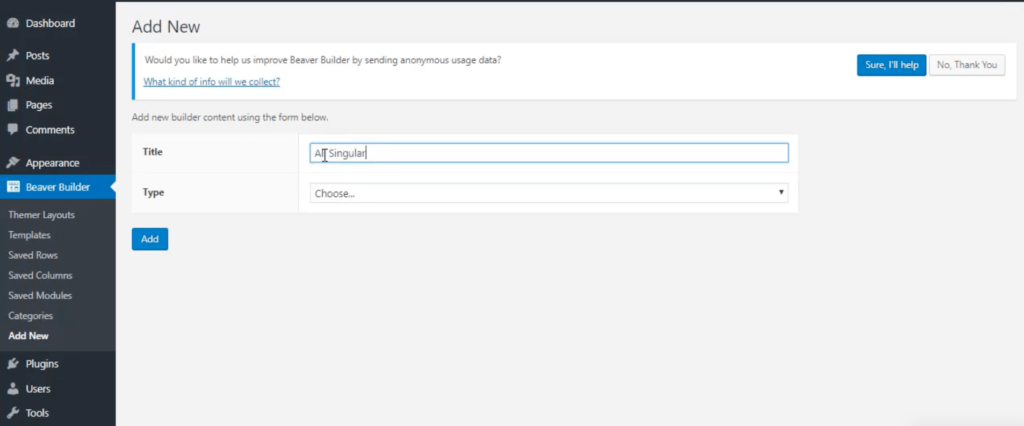
Step 3. Fill in appropriate Title and select the Themer Layout in the Type field.
Step 4. In the Layout field, select the option “Singular”.
Step 5. A new webpage will open, where you have to again select the location. It is recommended to stick with the “Entire Site”.
Step 6. Click on Launch Beaver Builder.
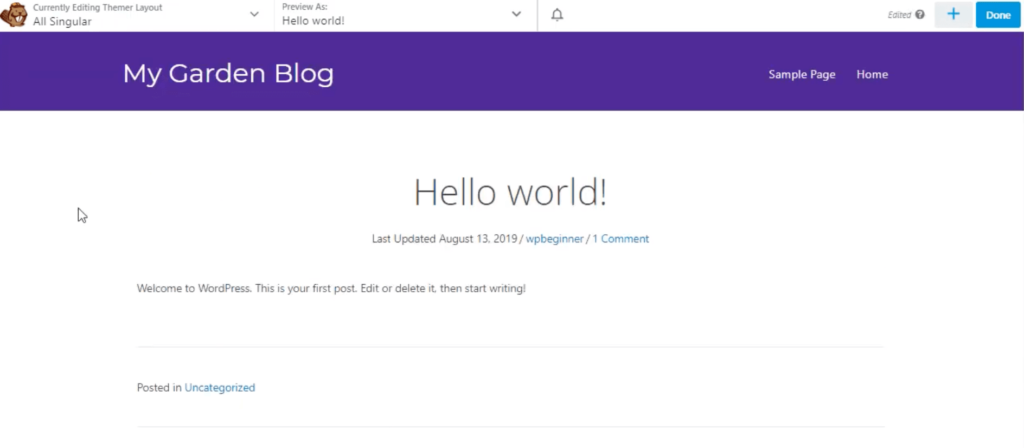
Step 7. The customization window will open, here you can make the single post layout more attractive and responsive.
Step 8. Navigate through different blocks of the webpage (Post title, Post content, Comments. Author Box) and customize them as per your requirements.
Step 9. Once you are done with customization, you can hit the “Publish” button.
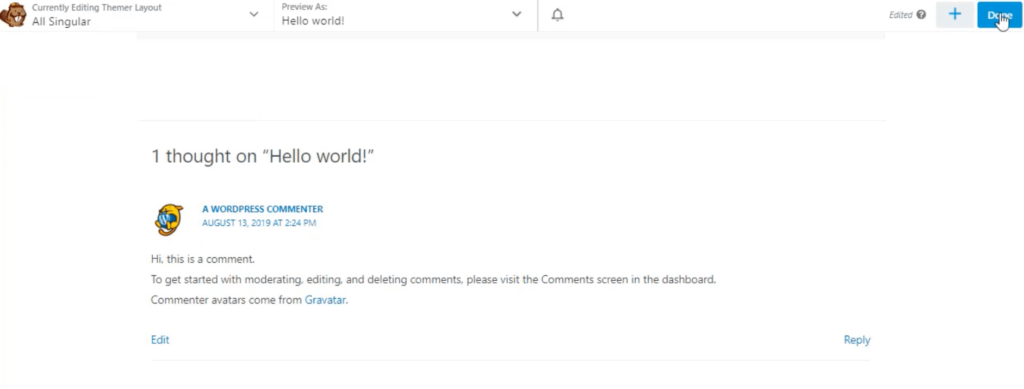
That’s how you create your custom post layout. Similarly, you can create an archive page, a 404 error page, and other custom pages. Beaver builder offers you almost all the customization options that you need to create a website.
Beaver Builder plugin also offers some inbuilt templates that are free to use. You can use those inbuilt templates and with some little tweaks, you can create a brand new custom website.
Final Note
In this tutorial, you have created your custom WordPress theme with all the elements ( Headers, Footers, etc ). Each and every element of a website can be customized using the Beaver Builder plugin. This plugin might seem costly but it is far cheaper than hiring a group of developers and UX designers to create a custom website. Apart from costing, Beaver builder will save dozens of hours and several layers of testing.
All you need is to arrange different blocks and make some tweaks to the webpages and boom! You will create your own custom WordPress theme without writing a single line of code. You can even make
