
Because of some security breach, you are unable to access your WordPress account. In such a situation, it’s best to deactivate your plugins.
In the past, whenever you felt the need to deactivate or delete a plugin, you would always go to the Plugins section on your dashboard and delete whatever plugin you didn’t like. But now that you’re locked out, the situation is not so favorable.
So, what can you do to avoid such a situation? In this article, we’re going to show you how you can deactivate your plugins even if you do not have access to your WordPress account.
There are two ways you can go about deactivating your plugins. Both of them require you to have access to the backend functionalities of your hosting provider.
So, let’s begin with the first method…
Method 1. Deactivating Plugins Using FTP
This method will require you to use the FTP (File Transfer Protocol), also known as the file manager that comes with your WordPress hosting control panel.
If you haven’t used FTP before, here’s a quick article that might help put you in the right direction. For the visual learner, here’s a YouTube tutorial on FTP.
First off, connect your WordPress site to the FTP client, or the File Manager option in cPanel. When connected, visit the /wp-content/ folder which is directly under the /public_html/ folder.
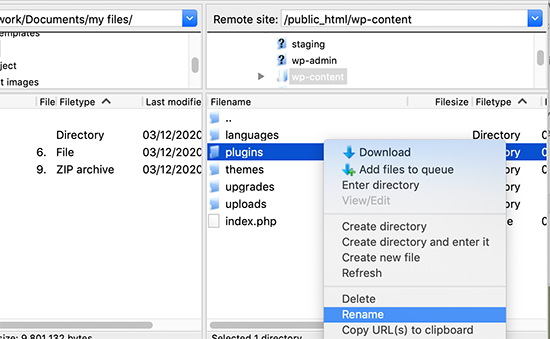
Once you’ve entered the folder, you will see a folder called plugins. This is the repository where your WordPress installation stores all of the installed plugins.
All you have to do at this point is to select the folder and rename it. Change it to anything that is relevant and according to your preference. As an example, we’ve renamed this folder as “plugins.deactivate”.
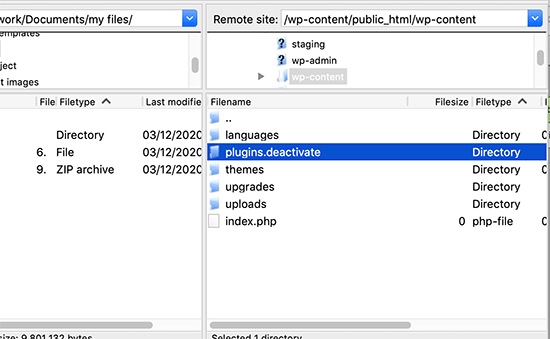
Performing this action will deactivate all the plugins installed on your site.
Whenever you power-up your WordPress site, the database searches for plugins folder. When it fails to find a plugins folder, all of the previously installed plugins are disabled automatically.
It’s beneficial to perform this when you cannot log in to your WordPress account. Try to log-in again and see if the issue is still present within your site. If you can log-in, then the issue was with your plugins.
Pro-Tip: Always install trusted plugins and theme from the official WordPress directory. If you want a premium version of a plugin or theme, make sure to purchase them instead of using a nulled theme or plugin since they can provide backdoors to hackers.
Once you have successfully logged-in, then you can visit the Plugins section of your WordPress account and see the list of plugins that have been deactivated.
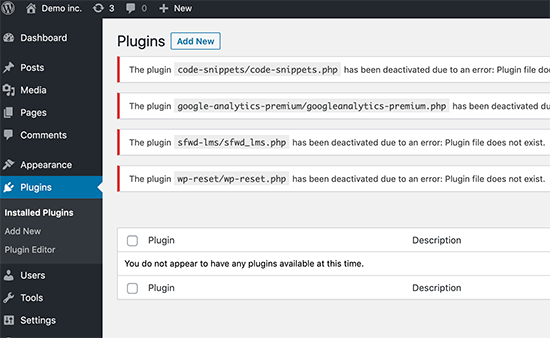
At this point, you will notice that your plugins have all been deleted as well. Don’t worry since they are present in the renamed folder on your WordPress database.
To recover them, navigate back to your FTP client and under the /wp-content/ folder find the folder you just renamed.
When you’ve found it, just rename it again to “Plugins”. Now, simply go back to the Plugins area in your WordPress dashboard and you will find all the plugins installed again.
Now, activate your plugins one at a time to see which one is causing your site to break. Once you’ve found the culprit, you can perform the renaming process again and finally delete the plugin or ask for support.
Method 2. Deactivate Plugins Using phpMyAdmin
For beginners, we would suggest to use the FTP method. That said, if you’re looking for something more advanced, then the best option for you to recover your WordPress login is deactivating WordPress plugins using phpMyAdmin.
Note: Before performing the steps mentioned below, make sure to backup your WordPress database. In the event of things going awry, you will have a working copy of your site at the ready.
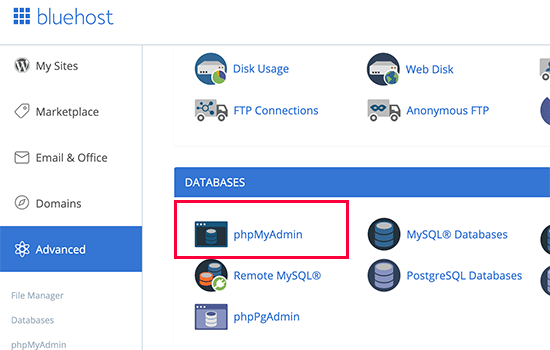
For this step, you will need to have access to your web hosting account. The cPanel interface of a hosting account varies depending on the provider. For this example, we are using a different hosting provider. Yours may or may not look the same.
Either way, you have to navigate to, or search for the phpMyAdmin icon. It’s almost always inside the “Databases” section.
Clicking on the icon will prompt the phpMyAdmin database manager to open up in your browser. Now, you will need to select a WordPress database. Once you’ve done that, you can view the WordPress database tables.
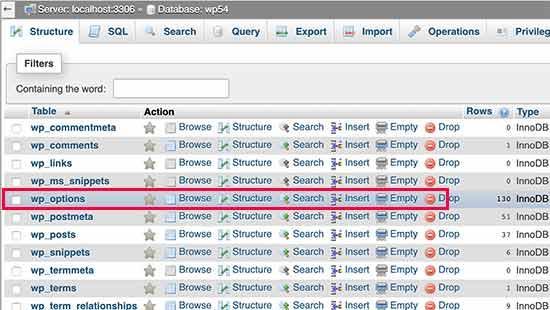
This is what a WordPress database table looks like. While they do have different applications, all of these tables have the same wp_prefix written prior to the table name. Database prefixes can differ depending on the database.
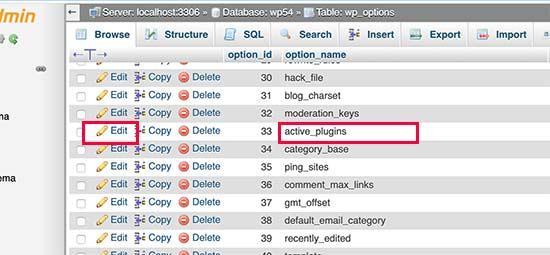
To delete the plugins, you have to visit the wp_options table. Under the row option_name, you will see a database entry called active_plugins. Click on the “Edit” just next to it.
All you have to do now is to see where the option_value tab is located. When you’ve found it, copy the following value a:0:{} and then click on Go to save changes.
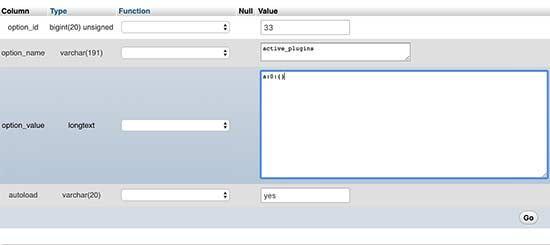
And that’s it. Using phpMyAdmin, you have now successfully deactivated all your WordPress plugins.
Try logging-in to your site again. If you’re able to access your WordPress site, then you’ve successfully circumvented the breach.
While this one requires fewer steps then the preceding method, it’s a lot more complex. To reiterate, you will have to perform a full site backup before going through with this step. There are plenty of WordPress Backup plugins that you can use for this purpose.
Conclusion:
Security is an essential consideration for your site. While there are plenty of ways for you to protect your site from hackers and malicious groups, in the event of something going wrong, you also need to be proactive against troubleshooting the problems. This is one of the ways you can troubleshoot your site if you’re logged-out.
We hope that with this article, you have managed to log back into your WordPress site. Which one worked best for you? Let us know in the comments section.
