
Presentation is the key, the more interactive your website is the more you will attract visitors. If your website is attractive and responsive, there are countless ways you can boost your profit. UI plays a vital role in business websites.
If you really want to convert your visitors into your customers, you have to get into their heads. Your website needs to be designed in such a way that they don’t feel like a stranger. You have to put in efforts and you have to show them that they are your valuable reader and you actually care for them.
If you will have a look at some big websites, they are designed in a way to leave an impact on our minds. You must be visiting dozens of websites in a day but could only remember a few of them. As a website owner, if you want to be on that list, you have to customize it accordingly.
A website UI mostly consists of widgets and fonts. Widget is something that can vary from niche to niche but Fonts remains unchanged. Most humans have a specific taste in terms of fonts. In order to check your visitor’s taste, you need to play around with different Fonts.
Here in this guide, you will learn about custom fonts, Where to find them?, and How to add them to your WordPress website?
What are Custom Fonts?
WordPress generally offers a limited variety of Fonts in it’s WordPress. Most of them aren’t so interesting and engaging and that’s where custom fonts come into play. Custom fonts are generally any font style that isn’t available in the WordPress dashboard and you have picked it from some other font family.
Now, you can either add this custom font to your website or can continue using the default available fonts. It is suggested to use custom fonts because as mentioned above, WordPress Fonts aren’t so engaging and mostly websites avoid using them.
Where to find Custom Fonts?
If you haven’t picked your custom fonts then you can refer to Google Fonts which has over 900 different font families or can even use Edge Web Fonts platform powered by Adobe to get more options.
How to Add Custom Fonts in WordPress
So, you have picked your desired custom font and now willing to add it to your WordPress Website. In order to add custom fonts to your WordPress website, you have to first convert the fonts to Web-Friendly Format.
How to convert custom fonts to a web-friendly format
Step 1. Visit WebFont Generator

Step 2. Upload your desired custom font.
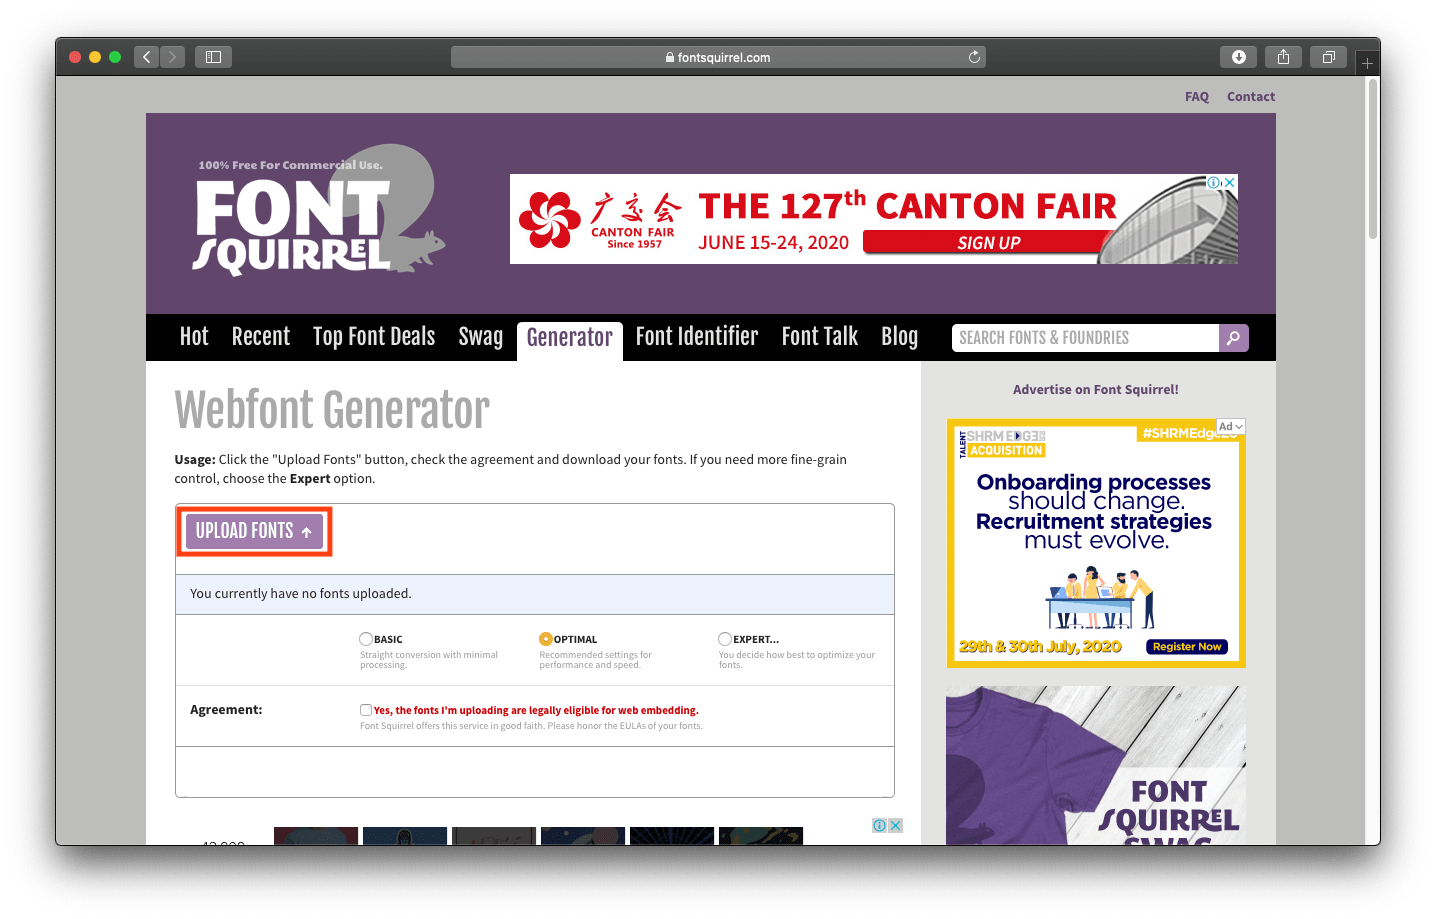
Step 3. Check all the required boxes of the Agreement Section.

Step 4. Hit Download Your Kit button.
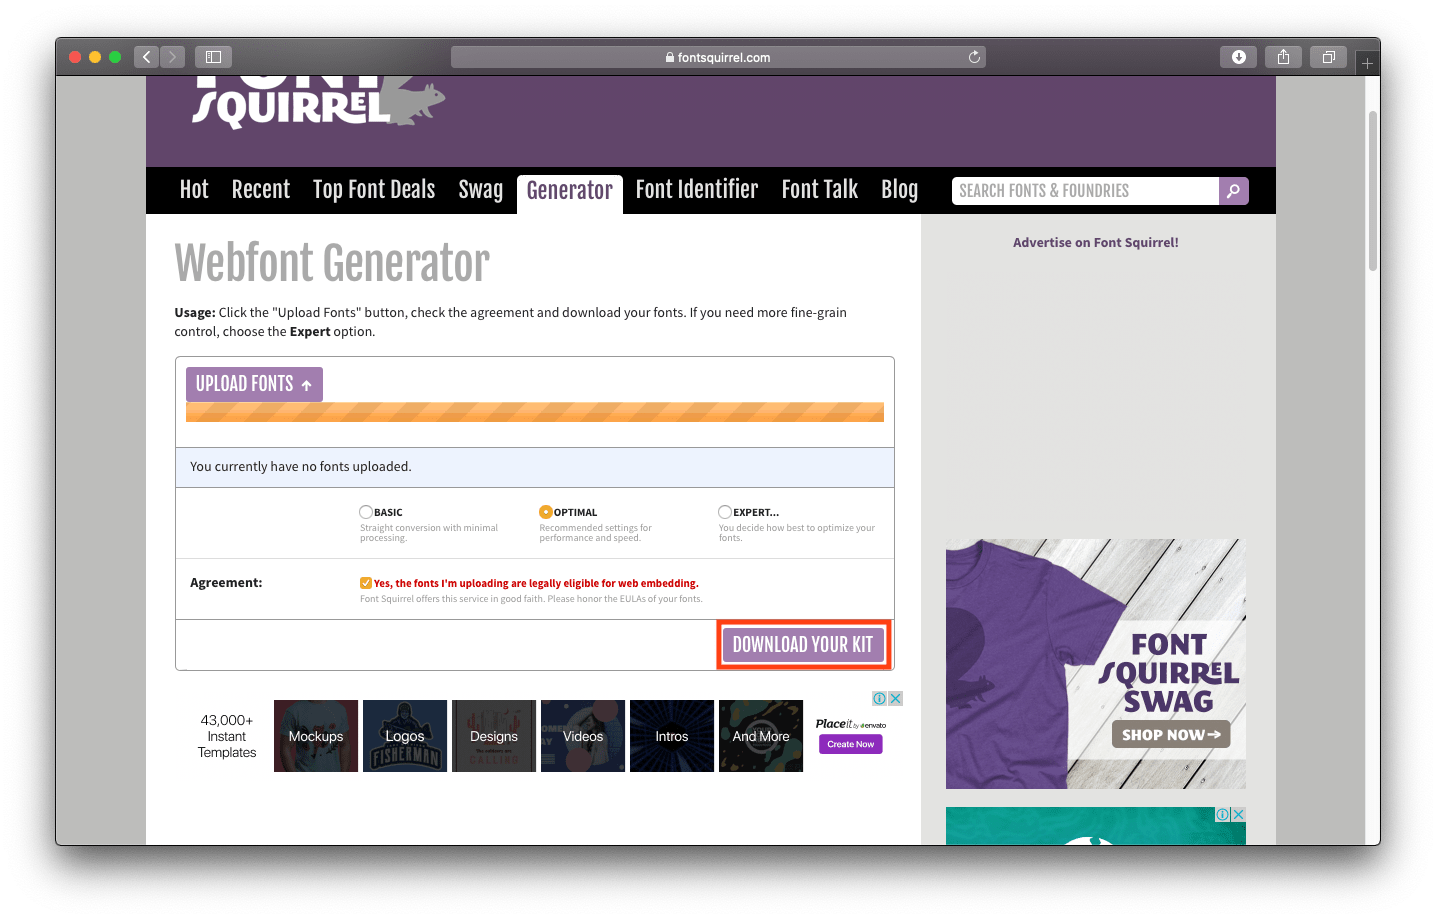
Step 5. A Zip file will be downloaded. It will have WOFF 2.0 and WOFF font format files with a CSS file.
Now, you are all set to add custom fonts to your WordPress Website.
There are two different methods to Add Custom Fonts to a WordPress website, both of them are listed here. I would suggest going through both of them and then deciding the most appropriate one for your website.
Method 1#. Manually Adding Custom Fonts using File Manager.
In this method, you need to access the file manager via the cPanel dashboard. Now, before you proceed, you must note that directly accessing the cPanel could lead to unauthorized access, in order to prevent your website from threats, you must prefer using VPNs and then accessing cPanel.
You can skip manually uploading the files to your file manager, instead, you can ask your web hosting providers to upload it for you.
Step 1. Enable your VPN
Step 2. Extract the zip file that you have downloaded earlier.
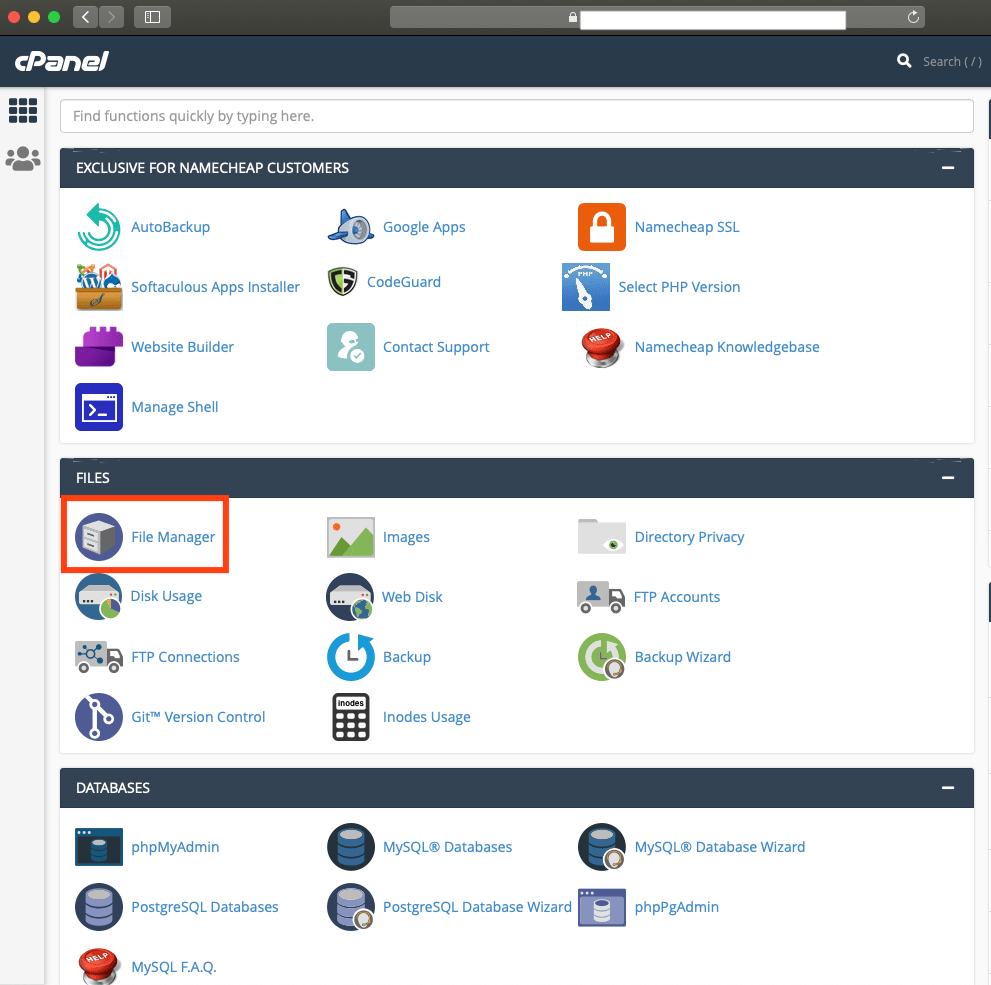
Step 3. Login to your cPanel Dashboard.
Step 4. Navigate to File Manager and Click on it.
Step 5. Navigate in your desired website’s directory.

Step 6. Locate the directory “wp-content/themes/your-theme/fonts”.

Step 7. Upload the extracted Zip file folder in the directory.
Step 8. Logout from cPanel.
Step 9. Login to your WordPress Admin Dashboard.
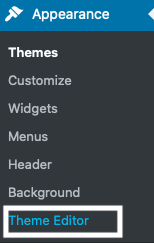
Step 10. Navigate to “Appearance” sections.

Step 11. Click on the “Theme Editor” option.
Step 12. Select Style.css file.
Step 13. Paste the following code in the file.
@font-face {
font-family: Aguafina Script-Regular;
src: url(http://test-site.com/wp-content/themes/twentynineteen/fonts/AguafinaScript-Regular.ttf);
font-weight: normal;
}
Note: Make sure that you have replaced the font-family and URL field with your desired font details.
Step 14. Click on the Update File button.
Congratulations! You just Added your desired custom fonts to your website. If you feel that this method is a little complex then you can refer to the next method.
Method #2. Add Custom Fonts using Plugins
If you want to make the whole process easier then you can install any fonts plugin. Follow the steps to add custom fonts without any hustle.
Step 1. Login to your WordPress Admin Dashboard.

Step 2. Navigate to the Add plugin section.

Step 3. Search for the plugin “Google Fonts”.

Step 4. Install and Active the plugin.

Since you have installed the plugin now, you can easily find your desired custom fonts and then can easily add it to your website. Google Fonts is a free plugin that allows you to select your desired custom fonts from a wide variety of fonts.
Final Note
So, in this tutorial, you have learned about How to Add a brand new element i.e Custom Fonts to your website in order to get more visitors. It is suggested to use the plugin method if possible, it is because using cPanel and File manager could be complex for you. But if you really don’t want to end up adding some extra weight of plugins to your website, you can ask your web hosting providers to do it for you but make sure you are following all the security protocols in order to avoid any vulnerabilities to your website.


